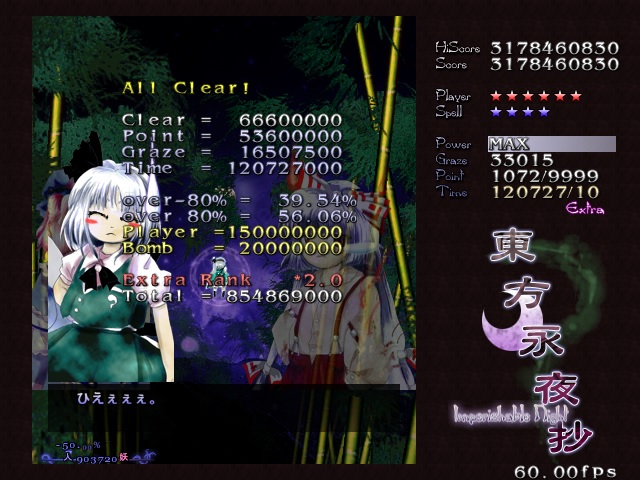
If you are reading this blog, then you most likely already know that on the 21st of June 2022, the world record for Imperishable Night extra with solo Youmu was updated for the first time in well over six years. The improvement came at the price of a failed spell, namely I failed the final spell, Imperishable Shooting. I will take you through the run while listing what went well and what didn't.
The run starts as it always does with the furballs followed by the first cancel of the stage. The furballs have some variance in graze, but overall doesn't matter too much. Over 3200 graze is okay, 3300 would be good but the difference in actual score is tiny. 100 graze in the clear bonus is only 100,000 score; and since you graze in full human, it's only about 33 graze difference, which doesn't even add up to 100,000 score. Plus star items are worth only 25 extra score with 100 graze difference. Truly negligible. This run had 3270.
The first cancel is a frame perfect cancel. Hitting the best frame is not important, however. Optimal time after killing the first fairy is about 750, here I got 575. It's a bigger than 100 time difference but resetting over something this seems silly. For most of the run, and for simplification, you may calculate that 100 time equals 1 million score. the value changes over the course of the run but this is a good benchmark to remember.
The important part for this cancel is that you want to kill the left fairy only and collect its items at maximum value. Collecting above the PoC line in full human gives double score for point items (both big and small). The right fairy needs to be alive because you gain more time by killing it by using the big fairy that spawns as you collect the items of the fairy you just killed. Doing this instead of killing the 2 fairies together is about 300 time you gain extra. There is one more important thing to keep in mind, however: You do not want to kill the big fairy immediately. If you did kill it instantly after the second fairy of the first cancel, you would end up gaining no time whatsoever. The reason being that you just cancelled out bullets from the large fairy with the smaller one, hence cancelling the big fairy means you don't cancel that many bullets less. This is clearly no optimal so you want to delay the kill of the large fairy by a second. I had good timing this run, but it wasn't perfect. maybe .2 seconds or so later would have yielded a bit more time, but if you get about 1000 time from the first large fairy of the stage, the cancel was acceptable.
What follows are two more large fairies. This section is easy to survive, but incredibly difficult to time properly. Probably people would call this deceptively difficult. You want to delay killing each of these two fairies too, but the issue here is that delaying the second large fairy for too long will mean you cancel bullets from the third fairy, which in turn loses time for that fairy. These large fairies have a very small window where they spawn a lot of bullets that don't move away from the fairies immediately. The kill timing is instantly after they finish firing the volley. This is true for both of these fairies. Very good timings give 1150-1200 time each. My timings in this run were not great. The second fairy gave just over 1100 time, which is fine. The third only net me just over 1000, which means I killed it too early.
The final fairy of this section is the same type as the previous three but the kill timing is different. The reason for this is obviously that more furballs spawn and they shoot a lot of bullets. Optimal timing for this cancel almost hits the item cap, but my timing this run was mediocre and didn't even hit 2000 time. Best timing for it is when the bullet is already filled with pellets, and then you want to time the kill in a way that you cancel right as another wave of pellets is being shot, basically cancelling all of those bullets. What is important to note, however, is that the furballs can run away if you do not pay attention to your option. This would cause you to miss an item. It doesn't necessarily sound like a big deal but a lower item count means that every time orb is worth 10 score less (taking effect every 2nd item). with over 120,000 time orbs gained, it's an unnecessary score loss. You should have 100 items after killing everything here.
After that is the first of 3 extremely tight cancels, but this one may be the easiest one to understand and do. It starts with three fairies each shooting a blue burst of bullets (I will be numbering them from left to right 1, 3 and 5; 2 and 4 are the ones that spawn in later). You want to misdirect the bursts of bullets near the right bottom corner. For an optimal cancel, you have to damage fairy 3 and 5 with you option and main shot. This has two reasons, which I will explain shortly. The bursts of bullets follow the line of familiars the fairies shoot, so once the direction is determined, you have to move under fairy 1. You want to kill fairy one just as the bursts of blue balls spawn. This is the same effect as in the main game. Many of your have seen it before - if the timing is correct, you gain a thicker cloud of time orbs (as in, you gain more time orbs). This applies to the extra cancels as well. Because there's less cancels overall and less bullets than on lunatic, the effect is less pronounced, but it's absolutely vital for good time gains nonetheless.
This cancel has the spawn timing cancel twice. This first kill is the first one. As you kill fairy 1, fairies 2 and 4 spawn in and shoot bursts of red bullets. Ideally you want to have those aimed somewhat near the middle of the screen but I'm terrible so they're always aimed to the left. You want to kill fairy 3 and 5 at the same time. The second spawn timing is here. Fairy 3 (and fairy 5) spawns 5 familiars in a fan shape here. You want to shoot the familiars and kill fairy 3 and 5 as the red bursts spawn in. This is extremely difficult to time correctly as you only hit the familiars of the fairies, which only transmit 50% of your total damage dealt back to the fairy. Shooting the familiar also means you may destroy them if your damage control was not adequate when this cancel started. Timing the first kill is pretty easy, but this second one is one I miss almost every time. I missed it here as well, being just barely slow with the kill. There is not much to pay attention to when killing fairy 2 and 4, outside of not destroying their familiars. All in all, this set of kills may gain you up to 2400 time if everything was timing correctly and the misdirection of the bullets is orderly. I gained about 2150 time here, so the mistiming is evident. I also destroyed two familiars.
Once you take care of the first set of cancels, 2 sets of furballs spawn in. They do absolutely nothing for you so not letting them spawn any bullets is optimal as far as risk and reward is concerned. You gain 88 time total. Consistent at least.
Now comes the 5 fairy cancel. This one is not as straightforward as the 3 + 2 cancel from before, but the same principles apply. As all fairies spawn at once, you only have to misdirect the bursts once, but you also have to damage more fairies at the start. The ones you want to damage at 1, 2, 3 and 5. Fairy 5 is damaged by your main shot, as you direct the bursts near the right corner once again. Optimal aim is not exactly in the corner but slightly left of it. The way to damage fairies 1, 2 and 3 is to aimed your option between fairies 2 and 3 (with a 1 trail of bullets of the option hitting fairy 2, and 2 trails hitting fairy 3) and as the fairies take aim, you swipe your option in a way that you are able of dealing damage to fairies 1 and 2. you move immediately to kill fairies 1 and 2. The timing for this is difficult because you absolutely do not want to kill them at the same time, but rather after one another. The timing is as follows: Fairy 2 optimally dies first, taking the purple bullets they shot, but before the bursts spawned in at the familiar positions. Fairy 1 is the fairy that gains the spawn time. As fairy 2 dies, the bursts spawn in and you want to kill fairy 1 with such timing that you gain the full spawn time. This is difficult to do properly as you need to have dealt correct damage to both fairies beforehand. I nailed the timing in this run.
once you kill fairies 1 and 2, you move on to fairies 3 and 5. They again shoot out familiars in a fan shape and you again want to kill them without destroying familiars. This time the timing is not so important because every bullet is already long spawned it. I destroyed 1 familiar on each fairy so it wasn't perfect. Fairy 4 is, much like fairy 2 and 4 before, just a simply kill. Don't be dumb and kill familiars. The total time you can gain from this 5 fairy cancel is just under 2700 time; in this run I gain just over 2500 time, which was caused by destroying the familiars on fairy 3 and 5 as well as not misdirecting the bursts optimally.
More furballs. They shoot pellets again, which you graze at the top. The total graze is not as much as the start of the stage, but it's still over 2000 graze. The most important part of this gain is for the star items. Aiming the option downwards kills everything, but being careless will cause your gauge to be messed up so paying attention is advised. You lose half the value for items as well as lower graze (on the counter) if you're not full human.
The last cancel before the midboss is the only 8 fairy cancel of the stage. And quite frankly, I don't fully understand how I'm supposed to gain optimal time (about 3600 time). While you direct the aimed bursts in the bottom right corner before, you have the fairies shoot towards the left side of the screen here. The hard parts of this cancel are the damage control and well as the timing and the positioning (this is everything). The positioning is somewhat tricky because you once again want to gain the spawn cancel. That means if you're too high up on the screen the familiars will leave the screen too early and you don't gain the best cancel because less than optimal numbers of familiars are being cancelled. If you're too low, however, the bullet spawn overtakes the the familiar lines. This is not a problem on the previous cancels so much because the fairies spawn in a lot lower than here. So getting the balance between the two right is already fairly tricky. next is the damage control. In this cancel, you do not actually kill all 8 fairies, as not every fairy spawns a second set of familiars (which is weird but ok). The fairies you kill are fairy 1, 3, 5, 6, 7 and 8.
The way damage control works here is that you damage fairies 6, 7 and 8 with your option (and mildly damage fairy 1 with your main shot, but only the 1 bullet that's on the right of the main part of the shot). You then move in a way that the option trails among the fairies until the option lands on fairy 3. It is at that moment that you move towards the right of the screen to kill fairies 6, 7 and 8. The relationship between fairy 6 and 7 is the same as previously with fairy 1 and 2, where fairy 6 gets right of the purple bullets and fairy 7 gains the spawn cancel. Fairy 8 is whatever, but getting the damage and as a consequence the timing right on all fairies here is extremely difficult. Once these 3 are dead, you move below fairy 3, without stopping to shoot so that fairy 5 takes some damage as you pass under it. If damage control was perfect, then fairies 1, 3 and 5 should die at the same time, taking with them the mass of bullets that were spawned. This is again tricky as you damage control needs to be perfect in order to not destroy familiars. I got rid of a whole lot of them this run, netting me a total of about 3000 time for this cancel. my time entering Keine is 14,194 (after getting a little bit of time from shooting her as she enters the screen). This should be about average but considering how terrible my cancels are usually, this is slightly above average for me.
The extra boss in this stage has three spells and no non spells. Of those three spells, all of them are being milked for graze. The first spell, Old History, is easily the most consistent of the three patterns. As you start in full human, the first thing you need to do is to transition to full youkai. The best way to do this with solo Youmu is to shoot the boss until she spawns her first set of familiars. You then angle your shot to hit the two familiars near you and focus. As Youmu's option deals double damage, and therefore gains more time, if shooting a different target as the main shot, the time that lingers on the boss before being sucked in as well as the time from the two familiars being shot will be enough to bring you to 30 % gauge.
The graze itself is quite simple. You start below Keine, position yourself next to the lane so all the teal rice misses and and then stream the arrowheads to the right and upwards towards the familiar that spawns on the far right. At this point, the teal arrowheads spawn again. You now spin around the familiar and stream the red arrowheads back into the middle. You repeat this pattern until the time nearly runs out (cancel is on 4 seconds or so). If done properly, this should net a total of about 4000 time and around 30m SCB; it's likely that it will be slightly lower though, like 29.7m.
The alternative strat for this spell is to just shoot it unfocused; as in the strat ASL uses in his PB. It gains far less time and score in the long run, but your spell bonus will be higher and it saves time. Considering that ASL has a score of over 3.1b, clearly it's viable until that level. Do keep in mind that what I do gains 13-15m more score overall, however. Doing what my old PB does is not recommended. It's actually somewhat RNG based. You are high enough that the arrowheads may catch you after a tarp depending on how they spawn. It causes resets that aren't the player's fault and can become quite irritating.
Returning Bridge, or Ichijo, is the first really hard section of the category that will cause a plethora of resets all on its own. It may also be the first graze a new player to this category learns, but since it has a lot of variance, it's viable even at lower level scoring, particularly because its difficulty is highly dependent on how much graze you want to gain. Even at graze numbers as low as 1500, it's a net gain in score and definitely approachable. It does get incredibly difficult once you hit the 2800 mark with Youmu, though, which is about as much as I'd want from it currently.
The pattern itself is static but starts with a random orientation. That is to say, there are several way the start of the attack can go and some rotations are easier to graze and are worth more. This is only really important for practice scoring, but important to keep in mind if you want to optimize this spell. The pattern I got in my run is actually one of the worst to graze. The main goal for Ichijo grazing is to stick to the ball. Optimal and very risky would be to never move away from it, but that will eventually turn into effective luckshit. There are three phases to this patterns and you do each of them twice (the first and the final pattern are very short, however).
Think of the lanes in Ichijo in groups. 1 group being 4 lanes that converge on the ball. Phase 1 of the graze has you sidestep the middle lanes. Doing it to the right is better than to the left; the pattern slowly moves clockwise on its own axis so moving against the grain is easier. This first phase is, as I said very short because you want to move over to phase 2, the most profitable phase, as soon as possible. This one has you move along the ball while evading the aimed bubbles Keine shoots at you. The most effective way of dodging the bubbles depends on where you are in the pattern. If you're on the left, you move towards the right against the grain and jump over 2 groups of lanes, since the pattern is slowly moving into the direction where the bubbles currently is. If you're on the right, you move with the grain and jump 1 lane of the pattern, since you're moving with the grain, you leave the bubble being without issue. You extend this phase for as long as possible for best graze. You're doing if wrong if you can see you character's head. It needs to disappear in the ball. The third phase is the worst phase for grazing because you actively move away from the ball. The way this phase works is that you move down between the 2 middles lanes of a group. You quickly want to move on back to phase one, and then again to phase 2. Phase three comes up once more for the final three seconds of the attack. The highest known graze on this pattern is 3069 but I was assured that 3200 graze was possible if you're being reckless. I believe it. My graze here was quite low at 2705.
The third spell is a lot denser than the first spell but it looks similar. Here, you also start at full human. This spell has twice as many familiars per wave than the first spell, which allows you to gain a lot more time in the same time frame. The optimal positioning for the start of the spell is being below the two familiars to the right (the pattern is mirrored so you could also start of the left), and hitting both of them with 1 lane of your main shot. Your option should be angled in a way that you also hit the two familiars on the left. Once you focus, you should turn full youkai immediately. Youmu's time gain when shooting multiple familiars is honestly a bit disgusting. As for the pattern itself, you will want to graze it. The easy way is what ASL and I did in my old PB: You start at the bottom and move up a bit. This means you won't graze two lanes at all times. What I do is start higher up. This removes and hard visual cues and you mostly have to rely on gut feeling whether the height you chose will kill you or not. But it's mostly consistent I swear. There are soft cues you can use, like the teal rice pattern, which is static. Either way, you stream the red rice at an upwards angle. Be careful as the streaming here can be somewhat tight. It's also possible to be easily caught if your taps are too small. And if your starting height for the wave was wrong, you will get hit by one of the teal rice bullets on the way. Before resetting the position to prepare for the next wave, you go to sniff Keine's skirt for moral support. Right down the middle, stick your head between her legs. It gives extra graze somehow. There are seven waves total on this pattern and it gains about 15m over the old PB. Important gain.
I exit Keine with 31,351 time. This is lower than average because of the fairly terrible Ichijo but it's acceptable nonetheless. Honestly, anything is acceptable if it doesn't get hit. For the section with the furballs, I just stick to the top left corner and kill everything with my option. Youmu is quite versatile.
The first cancel in the 2nd half of the stage portion is the same as the first cancel in the first half. There are some important differences, however. The first one being that you are now at full power. The second one being that you have a choice in how to handle this cancel: There are two viable strategies the player can use for this cancel. The first one is the easier, more consistent one. It involves killing the two fairies at the same time. if done perfectly, they would yield about 1000 time. The second strategy would be killing just the left fairy (as you do at the start) and killing the right fairy when the first large fairy of the section spawns. This, too, is somewhat mirrored from the start of the stage. There is an important difference between the two sections, however: If you choose to pick the second strategy, you have to purposefully delay killing the large fairy that just spawned in. The reason for that is that if you do not do that, the freshly cancelled bullets (using the small fairy you left over) would already be cancelled, and as a result, would not be accounted for in the cancel of the large fairy. That means that if you kill the large fairy immediately, you just utilized a riskier strategy for absolutely zero gain.
By delaying the kill, you allow bullets to spawn first. The fairy is already damaged so a kill without destroying familiars is possible. But because the kill was delayed, the next fairy is already on screen before the first large fairy is dead. But it is entirely possible to destroy all 4 large fairies without destroying a single familiar.
With the first strategy of killing both small fairies together, you can get about 6000 time this section, but only if everything is perfect. More common is something like 5700 to 5800 time. With the second method, up to 6500 is possible, but 6100 to 6200 is more common. I used the second method, but only unintentionally. I hadn't intended to use it but failed to kill the fairy on the right and the only way to not just lose time was to go for the riskier strategy here. It didn't go particularly well, as I started with a very weak cancel (only about 400 time, instead of the wanted 700) and destroyed 4 familiars. This meant my time gain was actually the same as if I had just done it normally (about 5800). Unfortunate result. Over 37,000 time at this point is decent enough, though.
There isn't very much to say about the next section. The jellybeans is a pure item collection section. Each set of color has 24 point items in them, and there's a total of 6 sets, for 144 items overall. I think the only shot that can actually get them all is Marisa/Magic, because the master spark lasts for 12 years and kill everything, although I think even master spark misses some. In total it's (theoretically) possible to enter Mokou with 689 items.
For the first and second set (teal and green) you can follow the fairies as they spawn and collect every items for 48. The third set is blue and it's the set where most fairies are lost because the spawns are literally satan and they fuck off in less than 2 seconds. In this run I only get 11 out of 24 items from this section. My best is 15 or 16, so obviously I missed a lot but 11 isn't unusually low. The purple jellybeans are pretty famous for killing solo Youmu players. Most shot bomb during blue, at the end of blue or at the start of purple, but Youmu's option allows her to save the bomb and gain decent items by angling the option to the other side of the screen. Do this well and you will collect many items. I collected 15 here, which was decent I think. Unfortunately, Youmu is incapable of collecting all 24 items from this section because the fairies disappear too quickly, much like for the blue part, and the fairies in the front can block your shot so the fairies in the back leave the screen. You can minimize this only through angling it just right. The thing to pay attention to here is that you do not start this purple section too high, otherwise you will die by ramming the teal that spawn afterwards. Starting just below the PoC is good. You move up a tiny bit twice: Once shortly before the first jelly bean is about to hit you and the 2nd time once every fairy left the screen, to make sure you don't die by walking into some stray jellybean. The following teal and green sections are the same as before. With 13 missed on blue, and 9 missed on purple, I missed a total of 22 items, which is overall average.
The next section is another 5 fairy cancel, similar to the one in the first half of the stage. There is once important difference now, though: The fairies have less health, so performing the necessary damage control is actually a complete nightmare. If you deal with this the same way as you do at the start of the stage, you'll just kill fairies number 3 and 5 and lose an assload of time. I generally prefer mucking up the cancel by having a late kill on fairy 1, which means I don't get the thicker cloud of time orbs, but at least I can kill everything. Nicking Fairy 3 and 5 is all I usually do. You misdirect the aimed bursts just as you did before and kill fairy 1 and 2. There's one important difference here compared to the first cancel, though. You move right a bit more to actually damage fairy 4 before the 3 remaining fairies shoot their 2nd set of familiars. Damaging fairy 4 in this way allows you to actually kill it without destroying almost all of its familiars. it's an easy to miss movement if you're watching the replay but makes a difference of over 150 time compared to not doing it. You now kill fairy 3 and 5 while cancelling leftover bullets. Be careful, however. The final death fairy of the stage will already have spawned at this point and if you didn't damage fairy 3 enough, it will hide behind that final fairy. If that happens, you lose the items it carries - which is 12 - and might as well reset. Do be mindful of that. Kill fairy 4 as leftover, just like with the 5 fairy cancel in the first half. Go to the right side of the screen to PoC, there are still gaps not filled by the death fairy there. Move down towards the middle after.
This time was actually surprisingly perfect; might just have been the first time I got time this high from the cancel. I destroyed a comparatively small number of familiars (they have less health too compared to first half familiars), so the time gain could have been higher, but I timed everything perfectly.
The final fairy of the stage is a fairy with a fair bit of health. You can't particularly time the cancel as it spawns its maximum amount of bullets. The pattern is static. Moving left and right between the appearing gaps is consistent. It has a total of 17 familiars, and they are sturdy familiars. That means you can angle your option for extra time if you dare. it's about 200 extra. The problem with doing that is that more bullets spawn, and the timing of the kill becomes awkward as you have to make a final dodge as the time is being sucked in. If you focus tap that dodge, you will end up above full human and can't collect the items the fairy drops at maximum value. It's 40 items. With the extra time, you gain 2400 time from the fairy; regular kill is 2200 time. I always do the regular kill, simply because it's more consistent.
I entered the boss fight with 667 items, 11283 graze, 42663 time and just over 800m score. The time is a bit above average, which helped my score a bit; 800m score is rather difficult but not a rarity anymore. The items are, as I mentioned before, average. The graze differences entering the boss are fairly inconsequential, it's usually just over 11000, as it is here.
To be continued in part 2, the boss fight.
Keine Kommentare:
Kommentar veröffentlichen